
Benefits. Working with a stringer
Hi all! Today we have prepared a translation of an article about working with stringers. Two main points in working with a stringer are HOW to work with it, and WHERE to use it?
Today’s lesson is about learning to work with a stringer. And where and how you apply your skills depends entirely on you. There are no specific recommendations for use here, so as not to create a framework for your imagination. Look around — nature, art, works of other masters; you will definitely find something to be inspired by.
Many lampworkers think that dealing with a thin stringer, the so-called ‘hair’, is very difficult. This is not entirely true. If you believe it is difficult, then it will be. And the first rule of work is this:
1. Believe in yourself and you will succeed!
However, to be successful, you need to understand a few more aspects of working with stringer hair.
2. Always prepare a “CLEAN” stringer
The word «clean» means a straight cut edge. Every time you put a stringer into work, you will end up with an uneven or fused edge (photo 1).
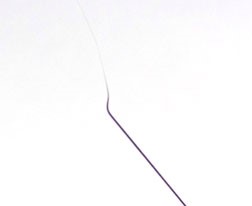
Photo 1
Before applying the next line with a stringer, be sure to cut off the uneven edge with a tool, or simply break it off (if the thickness of the stringer allows it). The edge must be cleaned in this way before each application to the bead (photo 2).

Photo 2
What happens if you don’t cut the edge, but simply fuse it? The answer is obvious — you will get a ball at the end of the stringer (photo 3).
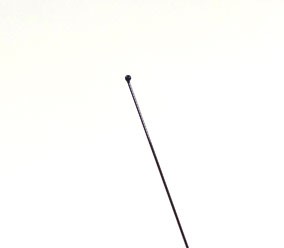
Photo 3
If you want to put a line on the bead with a ball at the end, then it makes sense to leave it (photo 4). What if not? In this case, just get rid of it before drawing the line. Cut or break off.
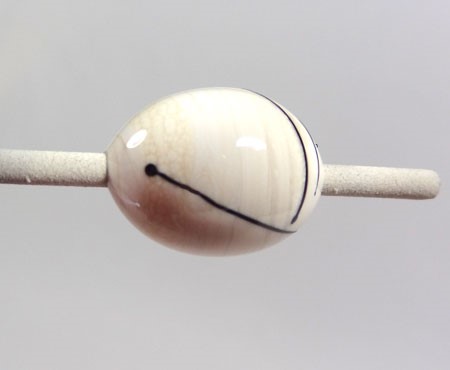
Photo 4
The ball at the end of the stringer has another unpleasant effect. When applied, it will not allow the stringer to fit tightly to the surface of the bead (regardless of the thickness of the stringer and the size of the ball). As a result, when heated, the ball may separate from the line.
And if such an effect is not part of your design, then it is important to know how to avoid it.
In the figure, the surface of the bead is indicated in red, and the green arrow indicates the point where the stringer does not fit tightly to the surface (photo 5).

Photo 5
3. Heat the surface of the bead, not the stringer.
This rule works with almost all stringers, especially thin hair stringers. When working with them, even the slightest contact with direct flame is unacceptable. It will receive the heat necessary to place the hair from the preheated surface of the bead.
We form a bead in the burner flame (photo 6). Let it cool so that the stringer does not deform the too liquid glass. Then you need to clearly imagine where the line will be. Typically this is a straight line. Because it is almost impossible to draw a pattern with such a thin hair, except for a small bend.
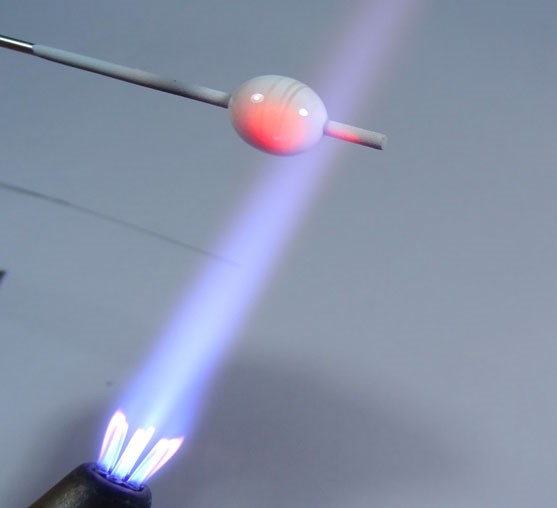
Photo 6
Once the application area is warm, do not hesitate to place the stringer. If you hesitate a little, you will have to warm up the bead again. There is no need to preheat the edge of the stringer, as you are used to doing with a thicker stringer. Simply apply it to the hot area of the bead (photo 7).
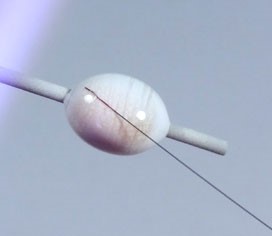
Photo 7
And a few more useful tips for successful work:
4. Keep the stringer parallel to the surface of the bead.
If the bead is straight, then it is easy to make a parallel. But on a round bead you will have to constantly adjust either the angle of the stringer or the position of the bead. As we already know, when working with a thin stringer near a flame, you need to be especially careful. This leads to the next important rule.
5. Don’t change the position of the stringer, change the position of the bead.
Many people have difficulty with this rule. They try to move the stringer one way or another. Try to focus on keeping the stringer as horizontal as possible, maintaining an angle of approximately 80 degrees, as shown in the next photo (photo 8).
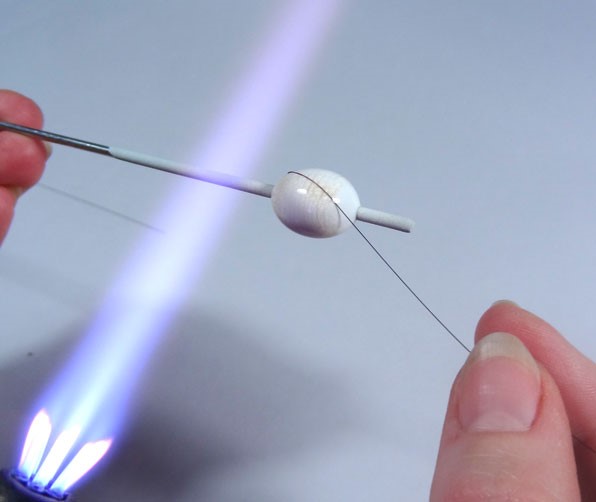
Photo 8
So, the stringer is always in the same position, which means that in order to draw a line at the desired angle in the right place, we will have to adjust the position of the bead. And this brings us to rule number 6.
6. Adjust the position of the bead depending on the desired angle and location of the line.
When drawing a line from left to right, hold the mandrel with the bead in a so-called “reverse grip” — fingers behind the mandrel, as shown in Photo 9. In this position, you can easily move and rotate the mandrel, keeping the position parallel to the stringer.
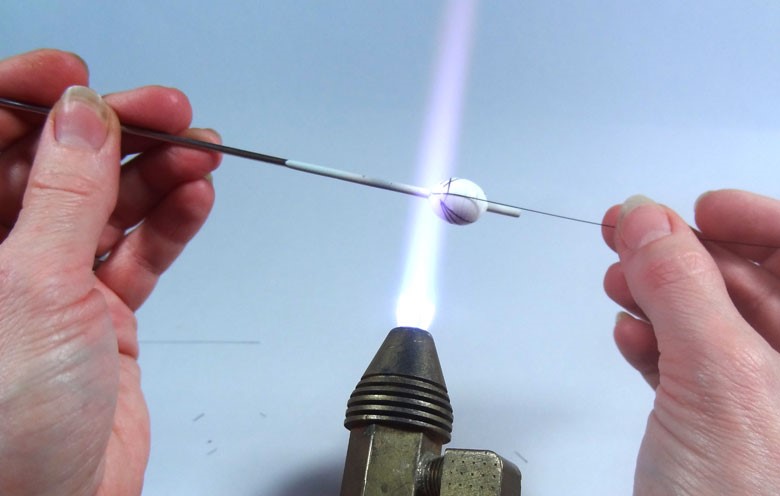
Photo 9
In cases where the line goes to the side (for example, directly perpendicular to the mandrel or at an angle), use the same “reverse grip”, but adjust the position of the mandrel, pointing it up or down. Look at the position of the hand in photos 10 and 11 (how the position of the fingers changes when the angle changes).
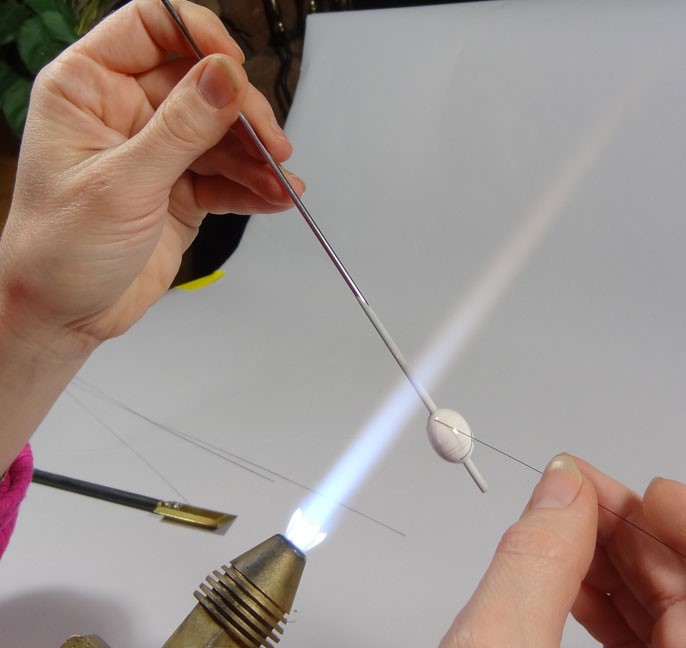
Photo 10
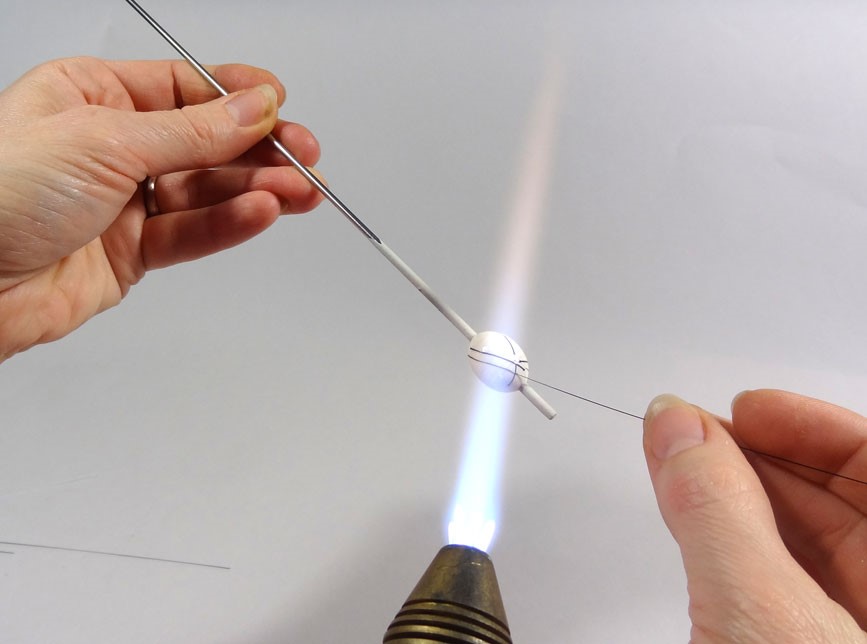
Photo 11
Holding the mandrel with a reverse grip is something of a personal quirk. I have never seen such a hand position in others. So this is not a required skill for successful stringer control. However, I find this grip to be the most comfortable for working with a thin stringer.
There are times when I hold the mandrel in the “normal” way. For example, when the stringer line runs along the bead. Or if the line goes around the bead perpendicular to the mandrel, then I hold my hand over the mandrel as if I were winding glass to form the bead (photo 12).
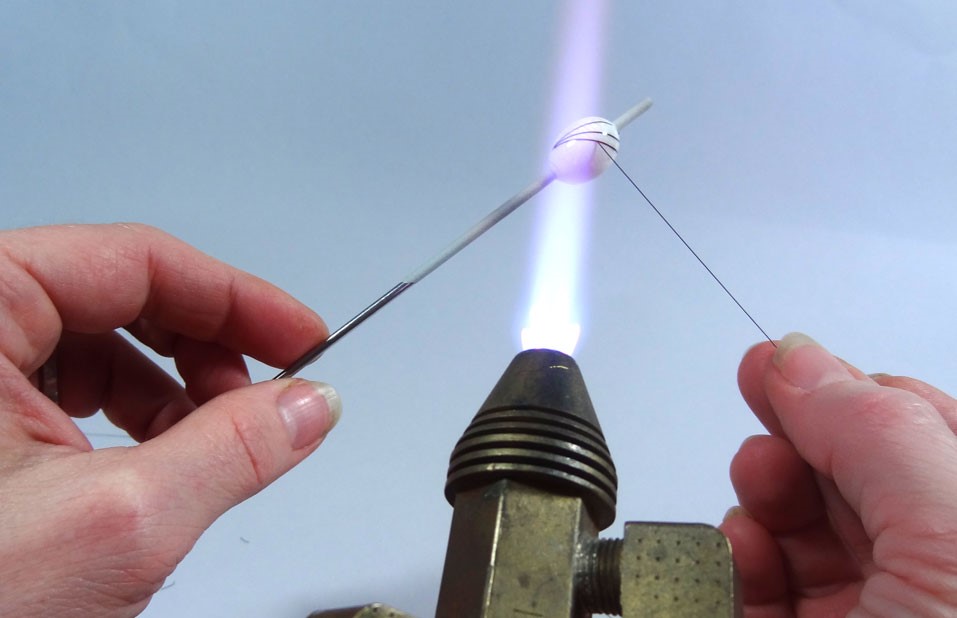
Photo 12
See how the angle of the mandrel changes when you change the angle of the drawn line (photo 13).

Photo 13
We have learned the most important rules of operation, but it is also worth paying attention to the stringer itself. We mentioned its position in relation to the bead, but how to hold the stringer itself? It would seem, what difference does it make how you hold it? We don’t move him. However, you need to be able to 1. apply light pressure on the stringer and 2. pull it back a little. Let me show you one more time how I hold the stringer (photo 14).
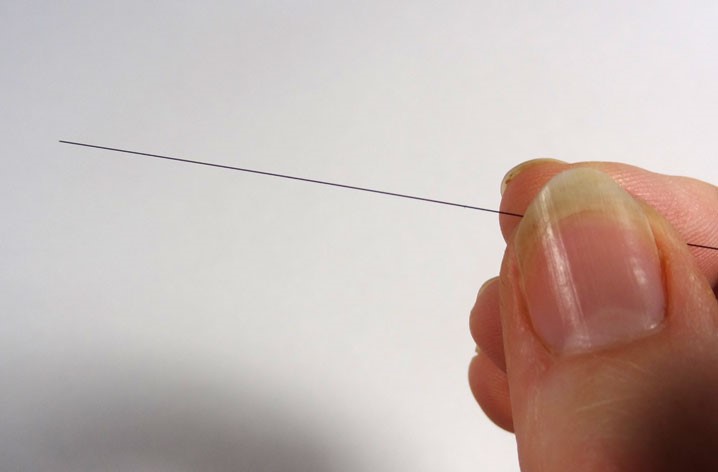
Photo 14
I hold the stringer like a spoon when I eat soup at my favorite restaurant. Try to find the method that is most convenient for you. And if you ever take a photo, make sure you don’t forget about your manicure =)
7. Work under flame.
This rule is always relevant when working with a stringer. And in the case of a hair stringer, you need to work even further from the flame. At what distance exactly? Depends on what kind of burner you are working with and how hot the flame you set. You need to determine exactly where your ideal point for working with hair is. It is usually further from the flame than you think.
So, let’s go over the main points again:
1. Hold the mandrel with the bead in the correct position
2. Make sure the stringer is “clean”
3. Warm up the place on the bead where the stringer line will go
4. Place the tip of the stringer on the bead (the stringer is parallel to the surface of the bead), DO NOT warm up the stringer before applying!
5. Apply a little pressure to the stringer and move the beads along the surface with light tension.
6. If the bead has cooled down, simply move it a little closer to the flame until the stringer begins to melt on its surface again. Just move the bead towards the flame very carefully. Remember that the heat to melt the stringer must come not from the burner, but from the surface of the bead.
7. Once the line is long enough, bring the bead closer to the flame and melt the stringer. If the tip of the stringer is not fused to the bead and sticks up, heat it a little and flatten it with a spatula or other tool.
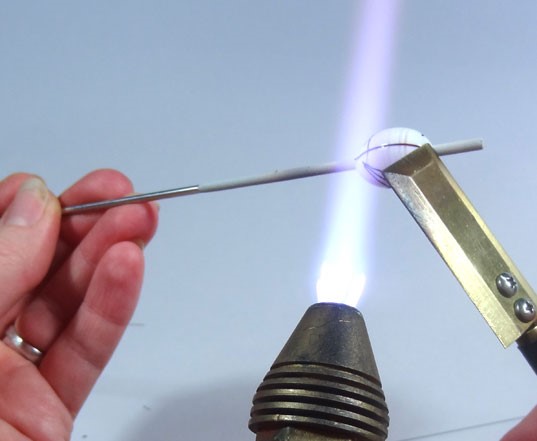
Photo 15
Perhaps this is all you need to learn to work with a thin stringer. I could have taken a thinner hair, but it would have been hard to see in the photo. Did I say it’s not difficult? It’s really not difficult. You can do it!
If you have any additions or questions, we welcome your comments below the article.
The original article was taken from the portal http://www.corinabeads.com.